Getting started: build your first connector end-to-end
This tutorial walks a new, self-service user through the dashboard, start to finish: sign up, connect HubSpot, author a connector’s config, publish it, push one event through it, and see it land in HubSpot. Budget about 30 minutes. Every screenshot below is a real capture against a live environment — nothing here is mocked up.
This is the dashboard-driven path. If you’d rather script the whole
thing against the HTTP API (curl, no browser), the
API-first quickstart already covers that end to end — the
same guide is also embedded as the description of the API’s own /docs
page. The two paths converge at the same config and the
same events; this tutorial is the complement, not a replacement.
Scripting or CI? The 15-minute JWT from
/api/auth/loginis meant for interactive sessions — from a script it means re-auth plumbing in a loop. Use an org API key (ps_org_...) as a long-lived Bearer token instead: Scripting it: long-lived sessions for CLI and automation below has the full recipe (where to create one, expiry, CLI usage).
What you’ll build
By the end you’ll have:
- A plugsync account and organization.
- One HubSpot portal connected via OAuth.
- One connector with one entity (a HubSpot object + field mappings) and one event flow (what to do when an event of a given type arrives).
- That config published as an active version.
- One event pushed through it and visible in the connector’s Activity tab, linked to the HubSpot record it created or updated.
Out of scope here
- Plugin (custom code) steps. The Event Flow Manifest covers declarative
mapping/branching, but HTTP calls to third systems, stateful logic, or
anything imperative is a plugin. Plugins are an Enterprise-tier
feature (
plugin_system_enabled): creating, pushing and promoting a plugin answer 402 on other tiers (Plan limits). See “When do you need a plugin, and which tier enables it” in the Plugin runtime guide. - Multi-brand / federated entities (more than one schema per entity, canonical transform steps). See simple-vs-federated.md.
- The CLI.
plugsync-cli(installable standalone:pip install plugsync-cli) wraps the same API this tutorial drives by hand. See the CLI reference.
For the full field-by-field schema once you’re past this tutorial, see the Config V3 reference and the Event Flow Manifest guide — both linked again at the end.
Step 1: Sign up
Go to /signup on your plugsync dashboard domain and create an account
with your name, email and a password (12 characters minimum).
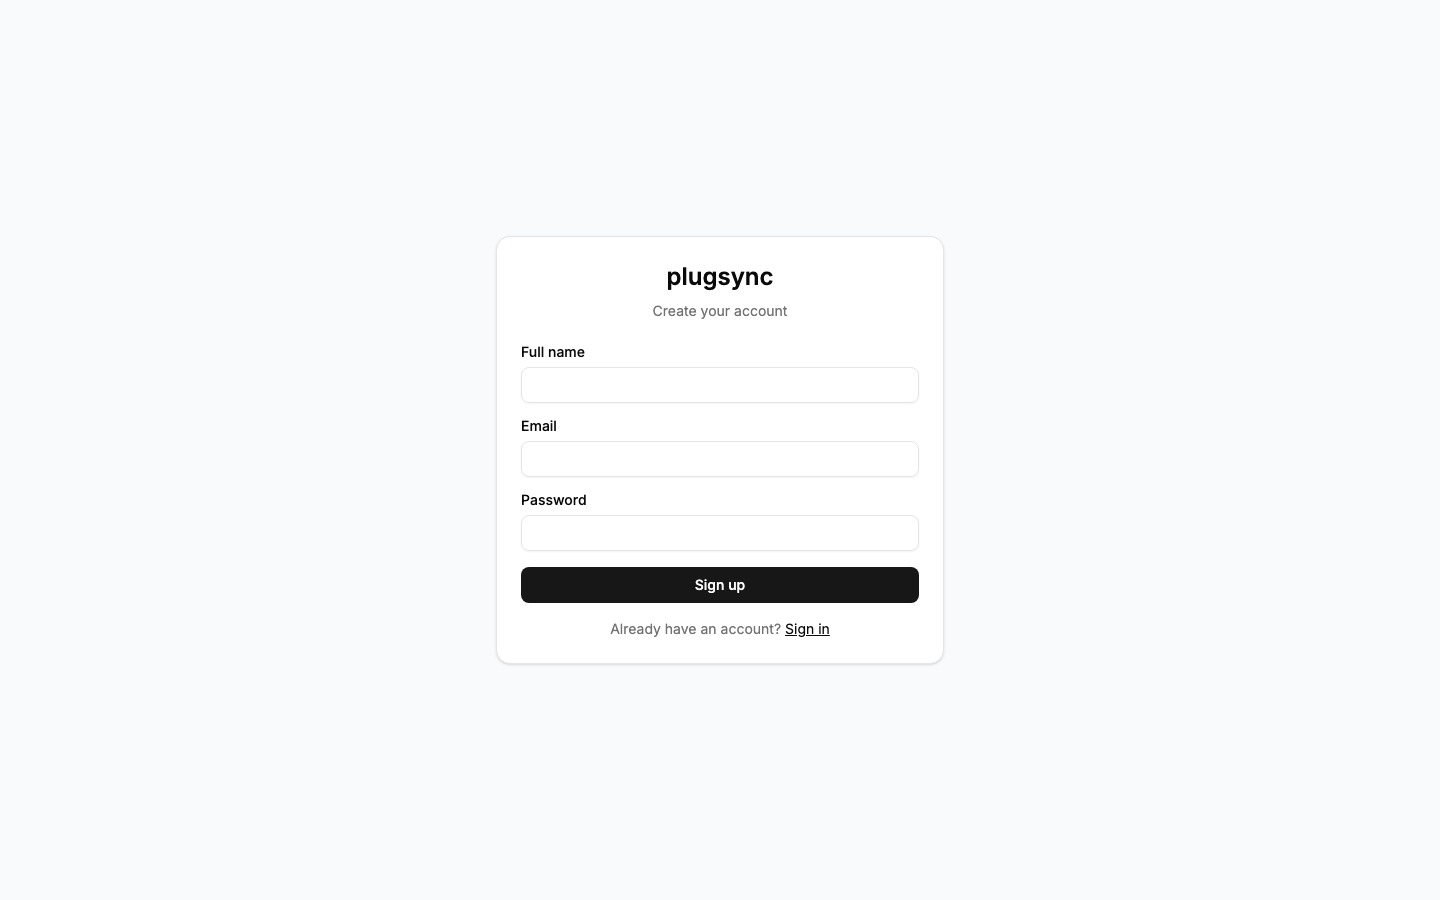
Submitting creates your user and a new organization (named after you, e.g. “Jane Doe’s organization”) and sends a verification email. The organization takes the name of your HubSpot portal (its domain) when you connect it in Step 3, as long as you have not renamed it yourself; you can rename it any time in Settings → Organization.
The signup form is one of three ways in. The other two are below; both skip parts of Steps 2 and 3.
Variant: continue with Google
When Google sign-in is available, /signup and /login show a
Continue with Google button under the form, separated by “or”. On
/signup it stays disabled until you accept the terms (“Accept the terms
above to continue with Google.”). The round trip to Google has to finish
within 10 minutes.
- New email. Signing up with a Google address nobody uses yet creates
the same user and organization as the form, with your Google name as
full name (or the part of the address before
@when Google has none). The account has no password. Google has already verified the address, so there is no verification email: Step 2 is skipped, your 14-day trial starts at once and you land on/onboarding/connect-hubspot(Step 3). Google must report the address as verified, or the sign-in is refused. - Email that already has an account. Continue with Google signs you in
to it and links the Google account, but only when Google is authoritative
for the address: a
gmail.comorgooglemail.comaddress, or a Google Workspace account whose domain is the address’s domain. Otherwise the page says “An account with this email already exists, and Google cannot confirm it controls this email domain. Sign in with your password.” One plugsync account links one Google account. - Email of an account that was never verified. From
/loginyou are sent to/signup(“This email has an account that was never verified. Accept the terms below and continue with Google to take it over.”). Continuing from there takes the account over, when Google is authoritative for the address as above (otherwise the page asks for the password, with the message of the previous case): its password and two-factor setup are removed, every existing session ends, and the address becomes verified. - Login with no account. Continue with Google on
/logincreates nothing: “No plugsync account uses this Google address yet. Sign up to create one.” - Two-factor on. An account with two-factor authentication asks for
the code after Google, on
/login, before the session starts.
Resetting the password (Forgot password? on /login) unlinks Google
from the account; the next Continue with Google links it again under the
rules above. An account created with Google has no password until you set
one this way, and a few owner actions ask for it, such as
closing the organization.
Sign-in errors show on the page you started from, with two exceptions:
the password request of an existing account, started from /signup,
shows on /login, and the takeover of a never-verified account always
shows on /signup;
Google sign-in errors lists
them.
Variant: install plugsync from the HubSpot marketplace
You can also start from HubSpot: install the plugsync app from the HubSpot marketplace and approve it on HubSpot’s consent screen. HubSpot sends you back to plugsync, and what happens next depends on the portal:
- The portal is already connected to an organization. Nothing is created. If you are a member of that organization you are sent to the login page (your HubSpot email prefilled) and then to Connectors; anyone else sees “Portal already connected” and is asked to get an invitation from an owner of that organization.
- Otherwise you land on
/hubspot-install, Complete your plugsync account, which names the portal you authorized (“You authorized plugsync on the HubSpot portal …”) and offers Cancel install if you did not start it. The page works only in the browser that did the install and only for 30 minutes; after that, install the app again from HubSpot.
Not signed in, the page is a signup form: Full name, Email (prefilled with your HubSpot user’s email), Password, Organization name (suggested from the portal’s domain), the terms, and Create account and connect (or Continue with Google). If the email already has an account the page says “You already have a plugsync account” and links to Sign in, which brings you back here signed in.
- Same email as your HubSpot user: the account is verified, the trial
starts, the portal is connected and you are signed in. You land on
/onboarding/configure-connector, past Steps 2 and 3. - Another email: the page warns “This is not the email you use on HubSpot: we will send a verification link before you can sign in.” You get a verification email with a link only (no code); the portal is connected when you open it, within the link’s 72 hours. Then sign in: the login takes you to the Step 3 page, but the portal is already connected, so go on to Step 4 from Connectors. With Continue with Google the same rule applies to your Google address.
Signed in, the page shows Signed in as your email and a Connect to
list with the organizations you own plus A new organization; pick one
and click Connect portal. Only the HubSpot user who installed the app
can do this: a session with another email is refused (“This install was
authorized in HubSpot by a different user than the one signed in here.
…”), and the way out is Cancel install, then Connect HubSpot on
/onboarding/connect-hubspot (the HubSpot card on the Connectors page has
the same Connect HubSpot button). A new organization starts a trial, an
existing one keeps its plan and its portal limit, and an organization being
closed refuses the portal. You land on /onboarding/configure-connector.
Step 2: Verify your email
After signup you land on /verify-email, which asks for the 6-digit code
from the verification email:
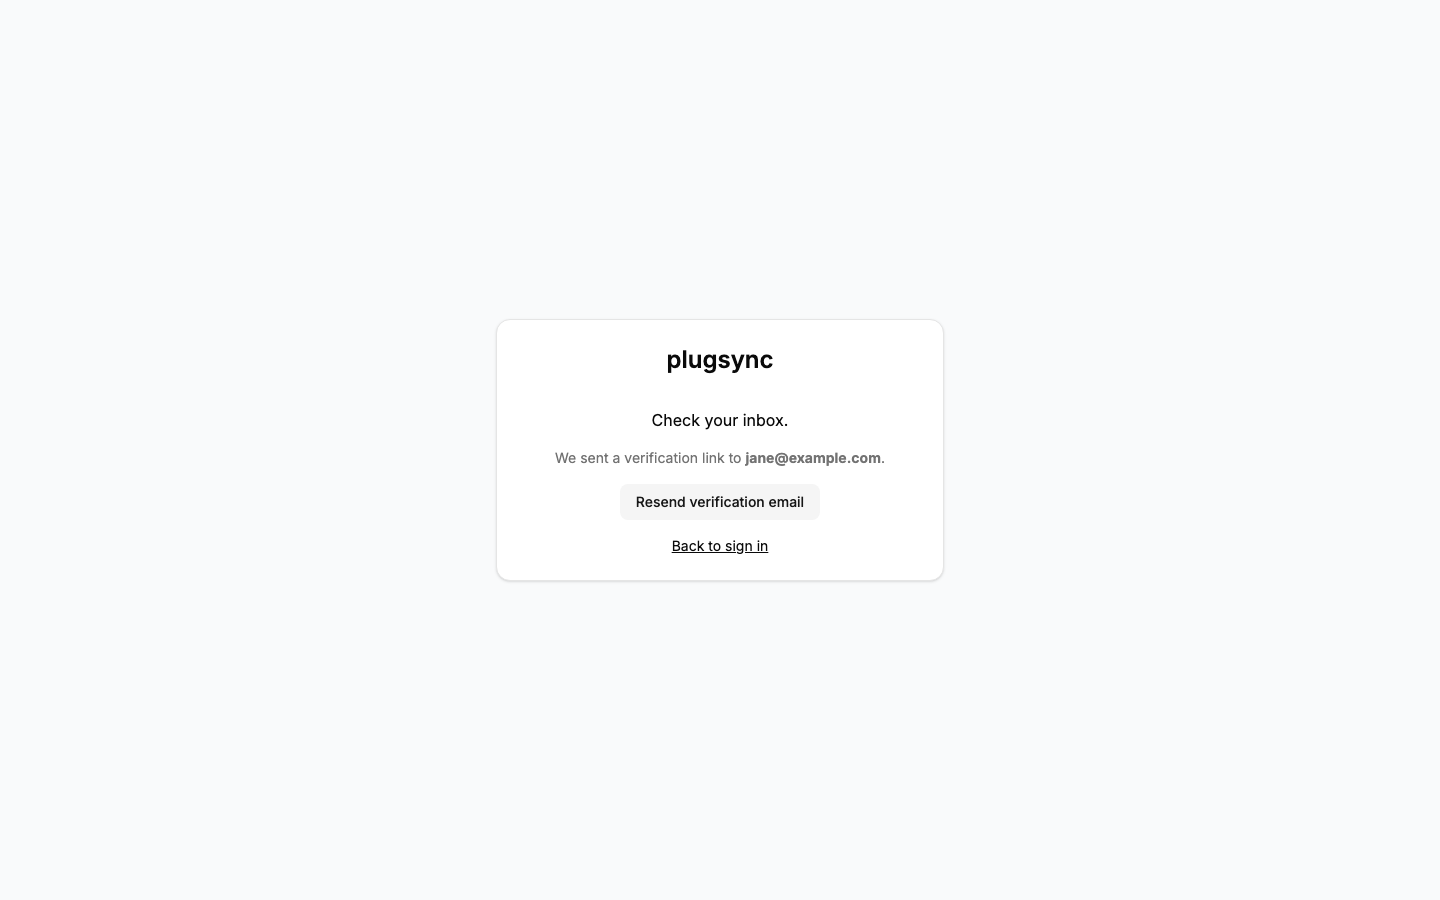
The email carries two ways to verify:
- The 6-digit code. Type it into the page you signed up from and click Verify and continue: your address is verified, you are signed in and you land straight on the HubSpot connection step below. The code expires after 15 minutes, allows 5 attempts, and works only in the browser that submitted the signup, for 24 hours after it; typed in any other browser it is refused. After 10 wrong codes in total, resends included, the code stops working and the link is the only way to verify.
- The link. Valid for 72 hours. Opening it from any browser or device verifies your address without signing anyone in: you are redirected to the login page (email prefilled) to sign in with your password, and from there to the HubSpot connection step. Forwarding the email, or having a delegate click the link, therefore only verifies the address.
Your 14-day trial starts when the address is verified, not at signup.
Didn’t get the email, or the code expired? The same page has a “Resend verification email” button, which sends a fresh code and link. Verification is mandatory: until the address is verified, signing in shows “Your email address is not verified yet” together with a resend button.
Step 3: Connect HubSpot (OAuth)
You land on /onboarding/connect-hubspot:
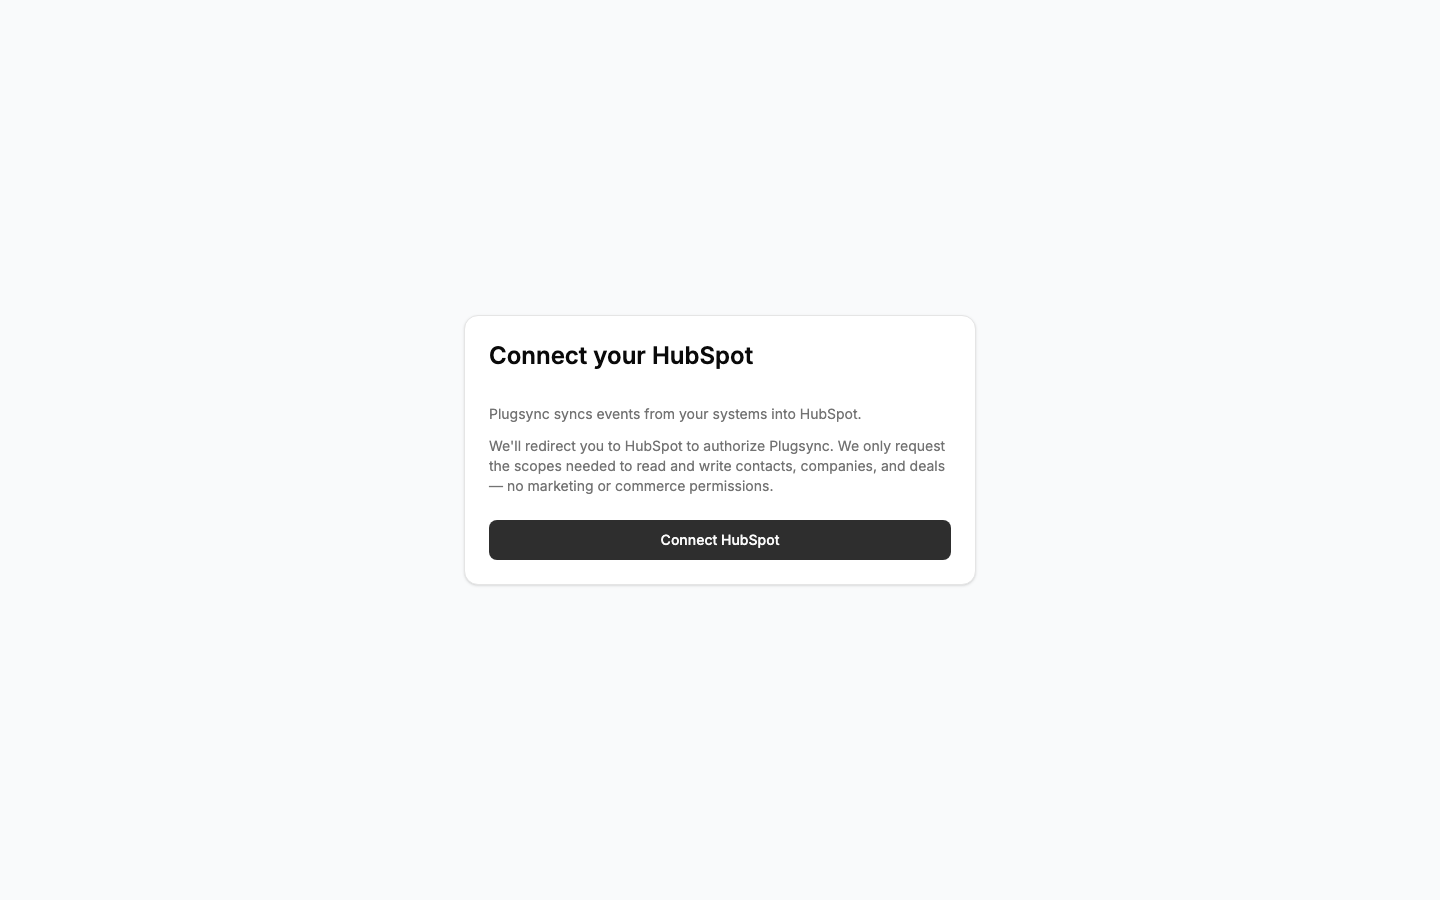
Click Connect HubSpot. You’re redirected to HubSpot’s own consent
screen (app.hubspot.com/oauth/authorize) on the plugsync public app. Log
in with the HubSpot user for the portal you want to connect (or pick it
from HubSpot’s own account switcher if you’re signed into several) and
approve.
At install, plugsync asks only for the scopes every connector needs:
oauth;crm.objects.contacts.read,crm.objects.contacts.write;crm.objects.companies.read,crm.objects.companies.write;crm.objects.deals.read,crm.objects.deals.write;crm.schemas.contacts.read,crm.schemas.contacts.write;crm.schemas.companies.read,crm.schemas.companies.write;crm.schemas.deals.write, for deal properties and pipelines;crm.objects.owners.read, to resolve owners by email.
The other scopes are requested only when a connector of your organization needs them, one group per feature:
| Feature | Scopes |
|---|---|
| Entities on a custom object | crm.objects.custom.read, crm.objects.custom.write, crm.schemas.custom.read |
products and line_items entities | e-commerce |
Attachment steps (upload_file, delete_attachments) | files.read, files.write |
submit_form steps (submission only: plugsync never reads your marketing content) | forms |
| Entities on tickets | crm.objects.tickets.read, crm.objects.tickets.write, crm.schemas.tickets.read, crm.schemas.tickets.write |
If your connectors already use one of these features when you connect,
the consent screen asks for its group right away. If you add the feature
later, the Review changes drawer names the missing scopes before you
publish and offers Reconnect HubSpot (the same action appears on the
warning shown after a publish). Pick the same portal on HubSpot’s account
picker, approve the new scopes and you land back on the connector; the
portal’s existing connection is updated in place. A reconnect never drops
a scope the portal already granted. HubSpot’s consent screen lists the
exact set before you approve, and a portal that lacks a feature (for
example e-commerce on a portal without commerce tools) cannot grant its
group: remove that feature from the connector, or connect a portal that
has it.
You do not need to pre-create anything in
HubSpot; properties and custom object schemas your
config references get provisioned automatically the first time you
publish (or re-provisioned automatically if you ever disconnect and
reconnect a different portal). What exactly gets created for you, when,
and the few things that are never created (forms, hs_* properties) are
documented in the
Schema provisioning reference.
On success, HubSpot redirects back to plugsync and you land on
/onboarding/configure-connector, Configure your first connector. From
there, Go to connectors takes you to the Connectors page used in Step 4
and Open the AI agent opens the in-app agent described at the end of
that step. Some organizations also see Start guided setup, which
creates a connector named “My first connector” and opens it (or asks you to
connect HubSpot first, if no portal is connected). If your organization
already has a connector, the page sends you straight on instead. If the
connection fails, see
Troubleshooting: OAuth connection failed below.
You can connect additional portals later, or disconnect one, from the same “HubSpot” card at the top of the main Connectors page — there’s no separate Settings page for this today.
If you installed plugsync from the HubSpot marketplace (see the Step 1 variant), the portal is already connected and you can go on to Step 4.
Variant: someone else administers the HubSpot portal
Authorizing the connection takes a HubSpot user allowed to install apps on the portal. If that is not you, an owner of your organization can send that person a connect link instead: they approve the connection on HubSpot without a plugsync account.
- Skip the onboarding page and open Connectors (
/connectors). The “HubSpot” card at the top has a connect link section, shown to owners only. Click Generate link, then Copy link in the dialog that opens, and send the link to the portal admin. - The admin opens it and sees Connect HubSpot: “You’ve been asked to connect a HubSpot account to your organization on plugsync.”, together with the scopes, the link’s expiry and “You don’t need a plugsync account to complete this.” They click Connect HubSpot, approve on HubSpot, and land on “HubSpot connected successfully. You can close this page.”
- The portal joins your organization exactly as if you had connected it, portal limit included. In the card’s list the link shows as Used with the portal’s domain.
A link lasts 24 hours and connects one portal once. Until it is used you can revoke it with Revoke; the list badges are Active, Used, Expired and Revoked. An admin who opens a revoked, used or expired link is told so and needs a new one. The calls behind the card are in HubSpot connect links.
Step 4: Create your connector
From the Connectors page, click + New connector:
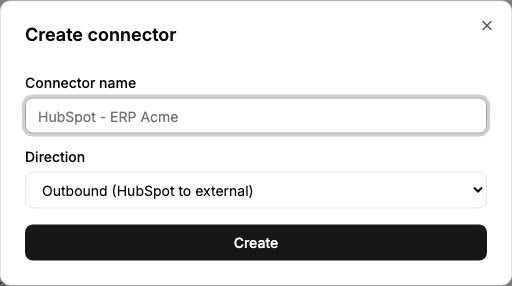
Give it a Connector name. The Default store ID is optional: it is only relevant if your source system is multi-tenant/multi-brand, so leave it blank otherwise. There is no direction to pick: whether a connector is inbound, outbound or bidirectional follows from the flows you give it (for what a bidirectional connector’s conflict resolution actually catches, see Troubleshooting: conflict detection looks inactive). Click Create: the dialog closes and the new connector appears in the list. Click it to open the connector’s workspace, starting from an empty draft.
Every connector is bound to exactly one HubSpot portal, both for writing records inbound and for listening to that portal’s journal outbound (see Connector and HubSpot portal). With a single portal connected to your organization, a new connector binds to it automatically — there is nothing to pick here. Connect a second portal and the dialog asks you to choose which one it binds to, with a HubSpot credential list; you can change that binding afterwards from the connector’s Settings section. Changing it later does not mean rebuilding the connector, but it is not free either — see Changing the portal for what survives the move and what is reset.
If your connector talks to an external system that needs its own credential (API key, bearer token, login, SFTP, OAuth2 client credentials), create it beforehand from Settings → Credentials, then reference it by name from the entity/source you’re configuring. When the secret needs to change later, rotate it: update the same credential in place, leaving its name alone, rather than deleting and recreating it. Every source keeps referencing it by name, so nothing else needs to change.
Renaming is the other half of that, and it is not free the same way: the name is the reference, so once a source points at it, renaming the credential is refused with the same conflict as deleting it, listing the sources that still name it. Repoint those sources first, then rename.
There’s a second path here too: Setup with AI opens the in-app agent, which can create the connector and propose entities/flows for you from a plain-language description of your source system. The agent only ever writes to the draft — it has no publish tool (see the draft → publish model below) — so everything from Step 6 onward is identical either way. This tutorial takes the manual path so every screen is explicit.
Step 5: Author the draft — entities
Open the Entities section and add (or, as here, inspect) an entity. An entity maps one business object to one HubSpot object type:
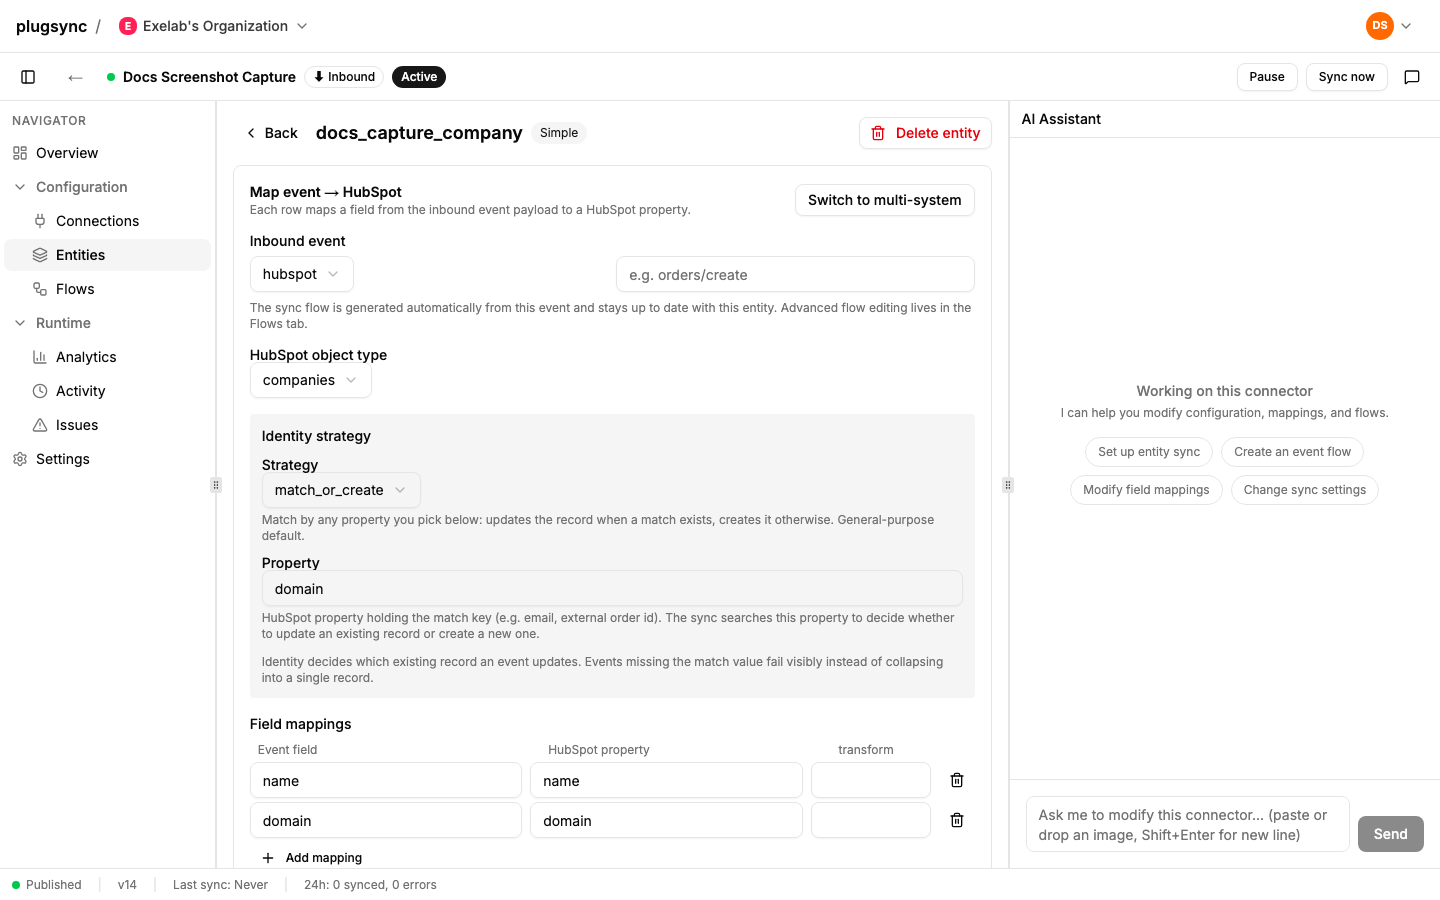
The essentials:
- HubSpot object type — which HubSpot object this entity syncs to (companies, contacts, deals, or a custom object).
- Identity strategy — how plugsync decides whether an incoming event
updates an existing HubSpot record or creates a new one.
match_or_createagainst a property (here,domain) is the general-purpose default: events missing that property fail visibly instead of silently collapsing onto one record. See Troubleshooting: mapping errors for exactly what that failure looks like. - Field mappings — one row per
event field → HubSpot property, with an optional transform. This is the simple entity mode (a singlehubspotschema, no canonical/federation) — the right shape for the large majority of connectors. See simple-vs-federated.md if you need more than one target system on the same entity.
Every field you see here maps directly onto EntityV3 in the
Config V3 reference if you want the
exhaustive version (every field, every validator).
Step 6: Author the draft — flows
Open the Flows section. In simple mode, plugsync can generate the flow for you from the entity’s inbound event automatically (this is not enabled for every organization yet; if you see no generated flow, create it by hand). Auto-generated flows open behind an “Advanced: edit flow” gate to discourage casual edits, but the editor underneath is identical to a hand-written flow’s, shown here:
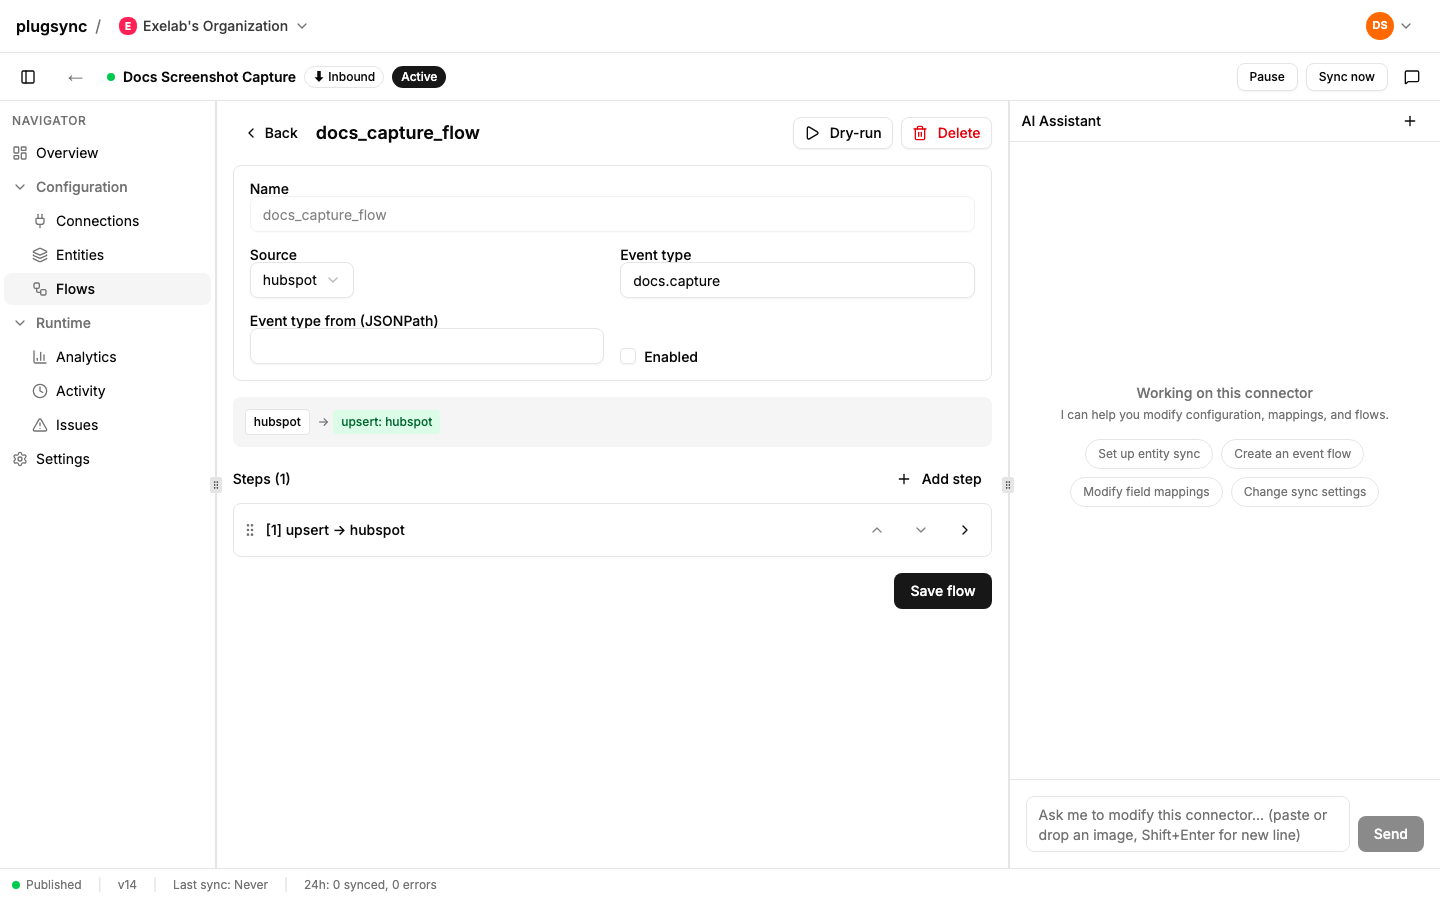
A flow says: “when an event of Event type arrives from Source, run
these steps.” Here, one upsert → hubspot step is enough to cover the
entity above end to end. The Enabled checkbox lets you disable a flow
without deleting it — useful while you’re still wiring things up. Toggle
it and click Save flow:
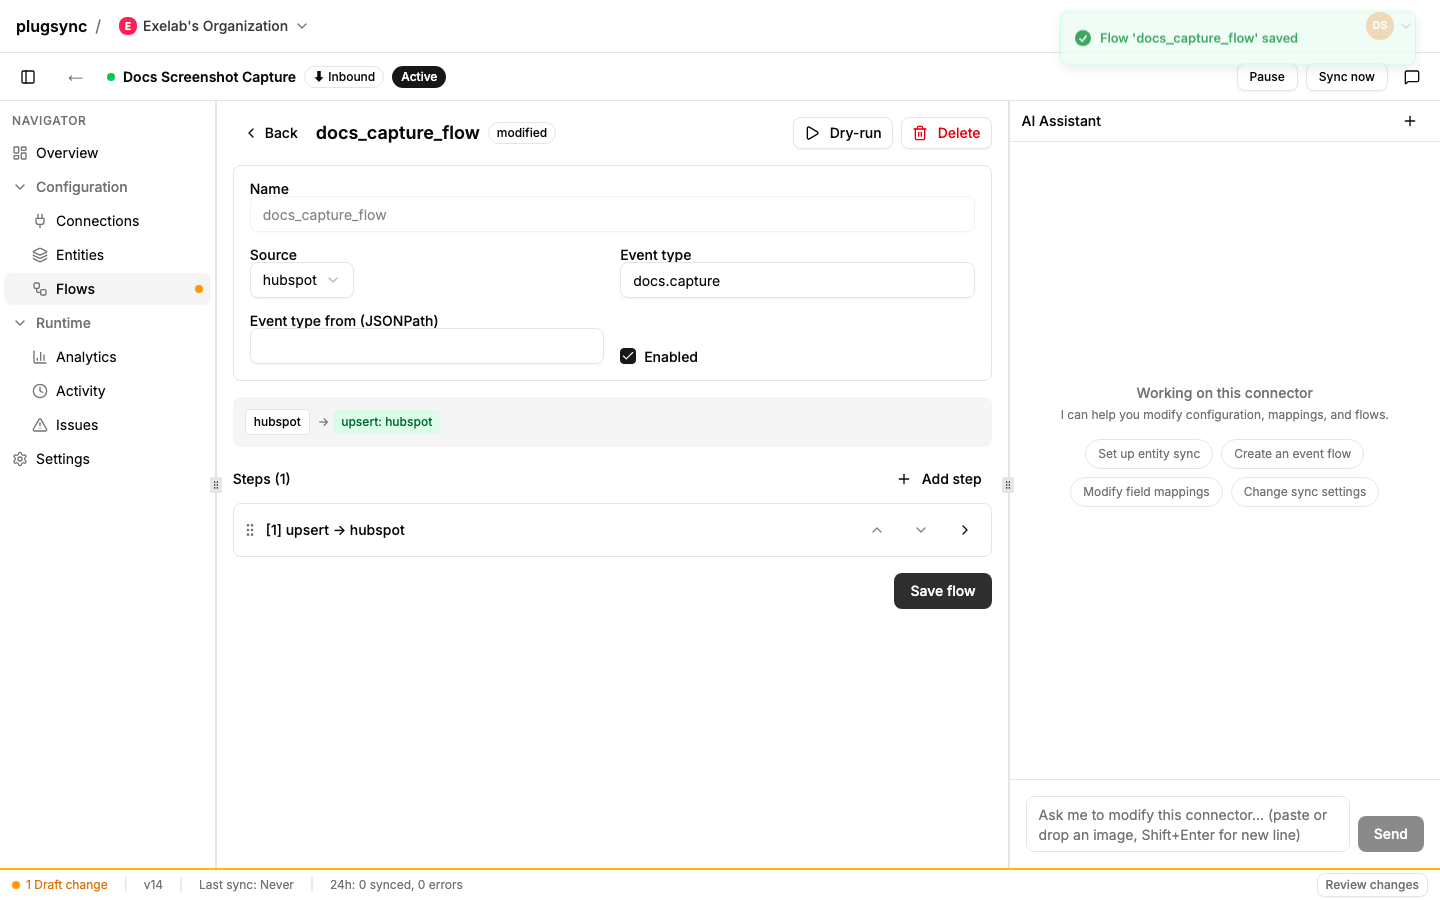
The status bar now shows 1 Draft change. Nothing you’ve done so far has gone live — every write in the dashboard (and from the AI agent, and from the MCP server, and from setup scripts) lands in a mutable draft, one per connector. Your draft is never executed: the running config is always the last published version. That’s the whole draft → publish model this tutorial is walking you through by hand.
For the step DSL itself (there are several more actions beyond upsert:
find, associate, transform, submit_form, upload_file, …) see
step-actions.md, and for the
event-sourcing side of a flow (what “Source” actually refers to, inbound
vs. outbound), see the Event Flow Manifest guide.
The same catalog (every action, transform and source type, plus the full
JSON Schema) is also available machine-readably: see
config-surface.md.
Step 7: Review changes and publish
Click Review changes in the status bar:
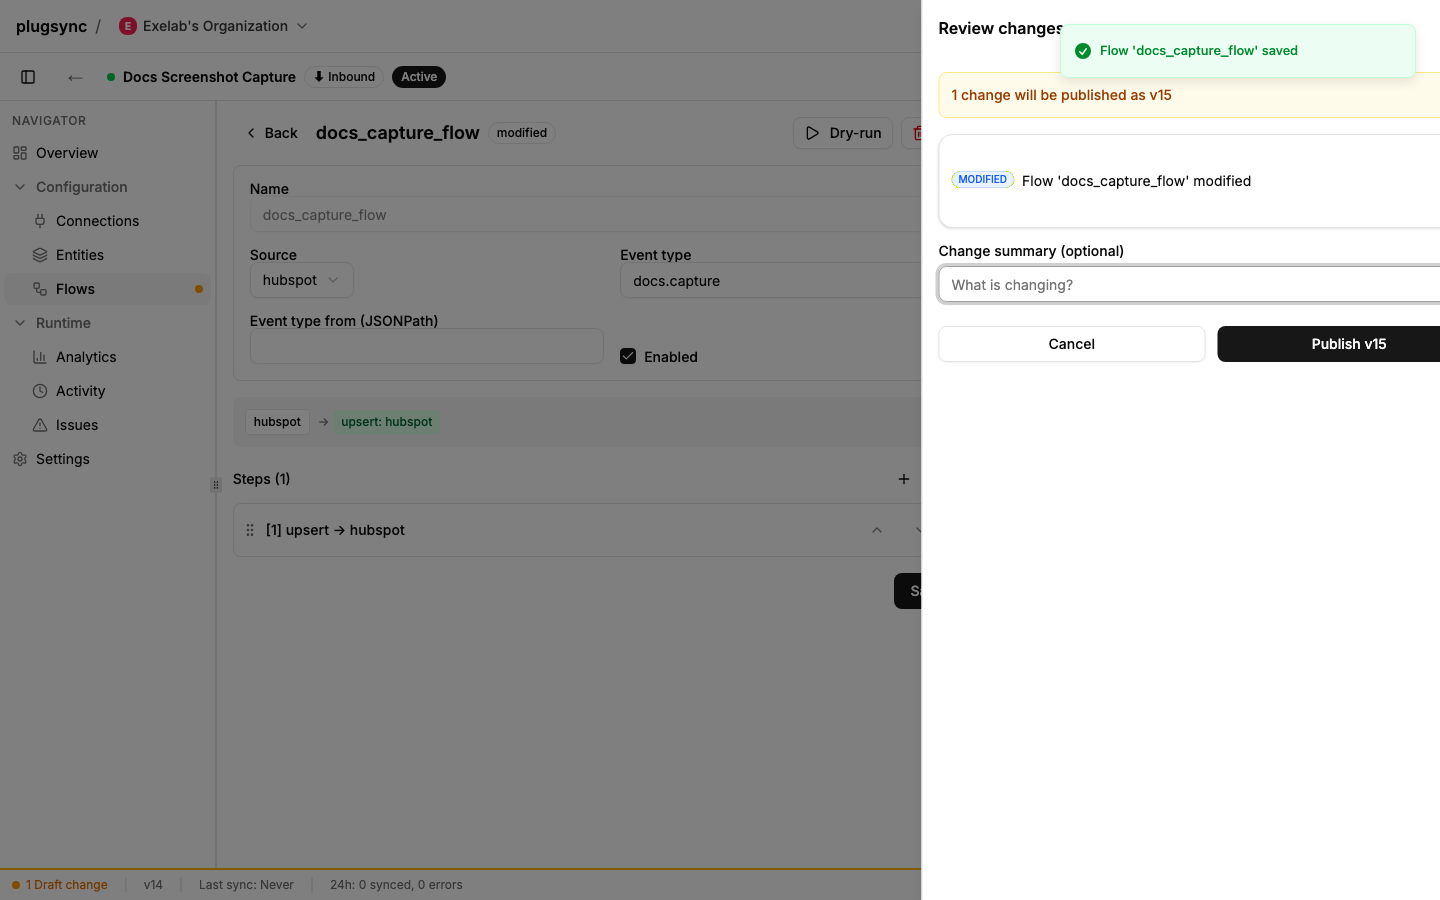
This is a diff against the currently active version — not a preview of what running the flow would do (that’s the dry-run panel from Troubleshooting below). Any preflight findings (e.g. “this property will be auto-created on publish”) show here too, as informational warnings that never block a publish. Add an optional change summary and click Publish v{n}.
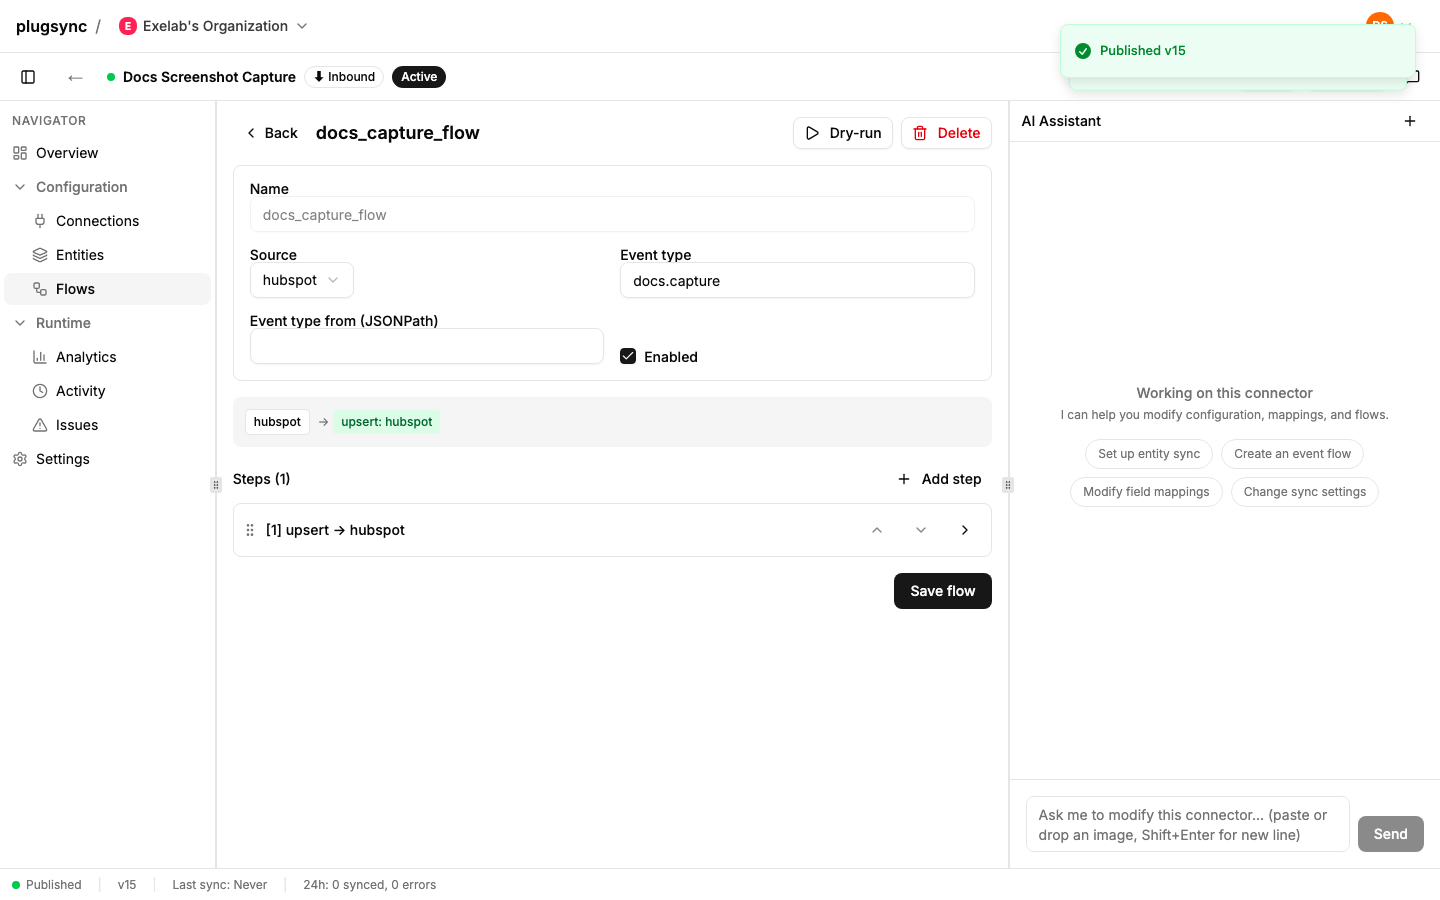
The status bar flips to Published at the new version. Publishing is
atomic: either version N+1 exists in full or nothing changed — there is no
half-published state. The new version usually starts serving traffic
within a few seconds. GET /api/connectors/{id}/versions lists the full, immutable
history and flags the active one with is_active; plugsync log <name>
prints the same list from the terminal (see
draft → publish). Nothing runs
on your connector until this step.
If publish fails with “your draft is out of date,” see Troubleshooting: publish conflicts.
Step 8: Trigger your first event
Events reach a connector over HTTP, authenticated with a connector API
key (ps_live_... — distinct from an org-level key, ps_org_..., which
authenticates the config plane instead; see
Scripting it). Create one from the connector’s
Settings section, API Keys card, Generate key: a dialog asks
for a label (pre-filled with a sensible default you can override), then
shows the raw key once — copy it now, it won’t be shown again.
Once you have a key, send an event:
curl -s -X POST $BASE/api/v1/events \
  -H "x-api-key: $API_KEY" -H 'content-type: application/json' \
  -d '{"event": "<your flow'\''s event type>", "data": {"name": "Acme Inc", "domain": "acme.example.com"}}'
# -> 202 {"event_id": "...", "status": "processing", ...}
event must match the Event type you set on the flow in Step 6, and the
flow’s Source must be event_api: events sent to this endpoint only
run flows with that source. If event_api is missing from the flow’s
Source list, add an event_api source from the connector’s Sources
section first (its name is always event_api). The business payload goes under data (matching the event field names from
your mappings, not the HubSpot property names on the right). The full
contract — webhooks, bulk import, dry-run without touching HubSpot — is
in the API-first quickstart; it isn’t
repeated here to avoid the two drifting out of sync.
Migrating an existing source with real history? If that source delivers over a webhook, enable it FIRST, then run your initial/historical load — not the other way around. A webhook turned on after the load already ran misses every delivery that fired while it was still off, and plugsync has no replay/recovery engine (yet) to backfill that gap. See Existing portal? preflight -> adopt -> load in the API-first quickstart for the full adopt-before-first-event walkthrough.
Step 9: Verify the sync
Open the connector’s Activity tab (Events sub-tab). A successfully processed event shows its HubSpot record column linking straight to the record plugsync created or updated — click through to confirm it in HubSpot itself if you want the full loop closed. A connector with no traffic yet shows “No events processed yet. Send events via the API to see them here.” — exactly what you’d expect before Step 8. If your event doesn’t show up as a success, work through the next section.
Scripting it: long-lived sessions for CLI and automation
Everything above drives the dashboard as a human, with the browser holding
your session. Once you’re scripting the config plane — CI, a setup script,
the CLI (pip install plugsync-cli) — you
want a credential that survives longer than a browser tab.
Logging in via /api/auth/login (as the API-first quickstart does) gets you
a JWT that expires in 15 minutes; keeping a script alive past that means
implementing the refresh-cookie-plus-CSRF-header dance described there. That
recipe still works and is documented as the JWT path, but for scripts and
CI the recommended credential is instead an org API key
(ps_org_...) — the same Bearer token, no forced expiry, no refresh calls:
curl -s $BASE/api/connectors -H "Authorization: Bearer $ORG_API_KEY"
# still works after hours, no refresh, no cookie jar
Create and manage org API keys from Settings → API Keys in the
dashboard (owner-only): give the key a label, optionally set an expiry date,
and copy the raw key — it’s shown once, like a connector’s ps_live_...
key from Step 8. The same page lists every key’s prefix, last-used
timestamp and expiry, and lets you revoke one instantly. Leave the expiry
blank for a key that never lapses on its own (existing keys created before
expiry support behave the same way); set one for a key you want to rotate
automatically — once it’s past expires_at, requests with that key get a
401 same as a revoked key, no separate error to handle.
To check which key a script is holding, call GET /api/me with it. With an
org API key the response describes the key, not a person:
curl -s $BASE/api/me -H "Authorization: Bearer $ORG_API_KEY"{
"principal_type": "api_key",
"org_id": "7b1e...",
"role": "api_key",
"api_key_label": "ci-deploy",
"is_platform_admin": false
}org_id is the organization the key belongs to and api_key_label is the
label you gave it in Settings → API Keys. role is always api_key: a
key is neither an owner nor a member, so owner-only operations (managing
team members, invitations and API keys themselves) still need an owner’s
login: the full split is in
Authentication, API keys and roles. There are no user fields (id, email, full_name, memberships),
because no person stands behind a key. With a login token the same endpoint
returns the user’s profile instead, with principal_type: "user", the user’s
email and every organization membership with its role (owner or
member), so principal_type tells the two shapes apart.
The CLI saves this directly, no /api/auth/login round-trip involved:
plugsync auth login --token ps_org_...or, for CI, skip the config file entirely and set the environment variable the CLI already reads on every command:
export PLUGSYNC_API_KEY=ps_org_...
plugsync pull my-connector
pull writes the connector’s draft as a directory, which is the config
document — the same one the dashboard edits:
my-connector/
|-- plugsync.yaml        # version, settings, conflicts, pipelines
|-- entities/            # one file per entity (Step 5)
|-- flows/               # one file per event flow (Step 6)
`-- sources/             # one file per event source definition
sources/ holds the reviewable half of each
event source: its
type and its config — the HubSpot property changes that emit an event,
a poller’s URL and schedule, a webhook’s signature algorithm. It is
versioned with the rest, so diff names the keys that changed inside it and
a publish applies them. The webhook secret, the enabled flag and the
runtime state are deliberately not there: they are managed from the
dashboard and the /sources endpoints, and a push never touches them.
Org keys authenticate the config plane only — same distinction as Step
8 above (ps_org_... for config, ps_live_... per-connector for events);
they do not work against /api/v1/events, which still needs the
connector-level key.
Troubleshooting
OAuth connection failed
Every OAuth failure sends you back to /onboarding/connect-hubspot with
an ?error=<key> parameter, and the page renders a red Connection
failed alert describing it. The ones you can act on:
| Alert | What happened | What to do |
|---|---|---|
| ”HubSpot authorization failed. Please try connecting again.” | plugsync could not complete the token exchange with HubSpot (an expired code, a HubSpot-side outage, a rate limit). | Click Connect HubSpot again. Transient HubSpot errors usually clear on a second attempt. |
”HubSpot connection failed (<key>). Please try again.” | Any other failure, named by its key. The most common is access_denied: someone clicked Don’t Allow on HubSpot’s consent screen. | Click Connect HubSpot again and approve the consent screen. For any other key, retry once, then contact support with the key. |
| Session expired | The authorization took longer than the connect session allows. | The alert carries a Try again button: it restarts the flow. |
| Connection could not be verified | HubSpot’s response failed the anti-forgery check, so the connection was not completed. | Start again from the same Try again button. Do not reuse an old /onboarding/connect-hubspot URL from your history. |
| Portal limit reached | Your plan’s number of connected HubSpot portals is already used up. The alert names the tier, the limit, and which portals are connected. | Disconnect a portal from the Connectors page, or upgrade the plan. |
If the first row keeps repeating across several attempts, it is a platform-side configuration problem rather than something you can fix from the dashboard — contact support with the approximate timestamp of the attempt.
Event mapping errors
The most common way a first event goes wrong is a payload missing the
property your entity’s identity strategy matches on. Rather than guess,
use the flow’s Dry-run button (next to its name in the Flows section)
before sending a real event: paste a sample payload and it traces every
step without touching HubSpot. Here it is catching exactly that failure —
a payload with no domain, against the entity from Step 5 that matches on
domain:
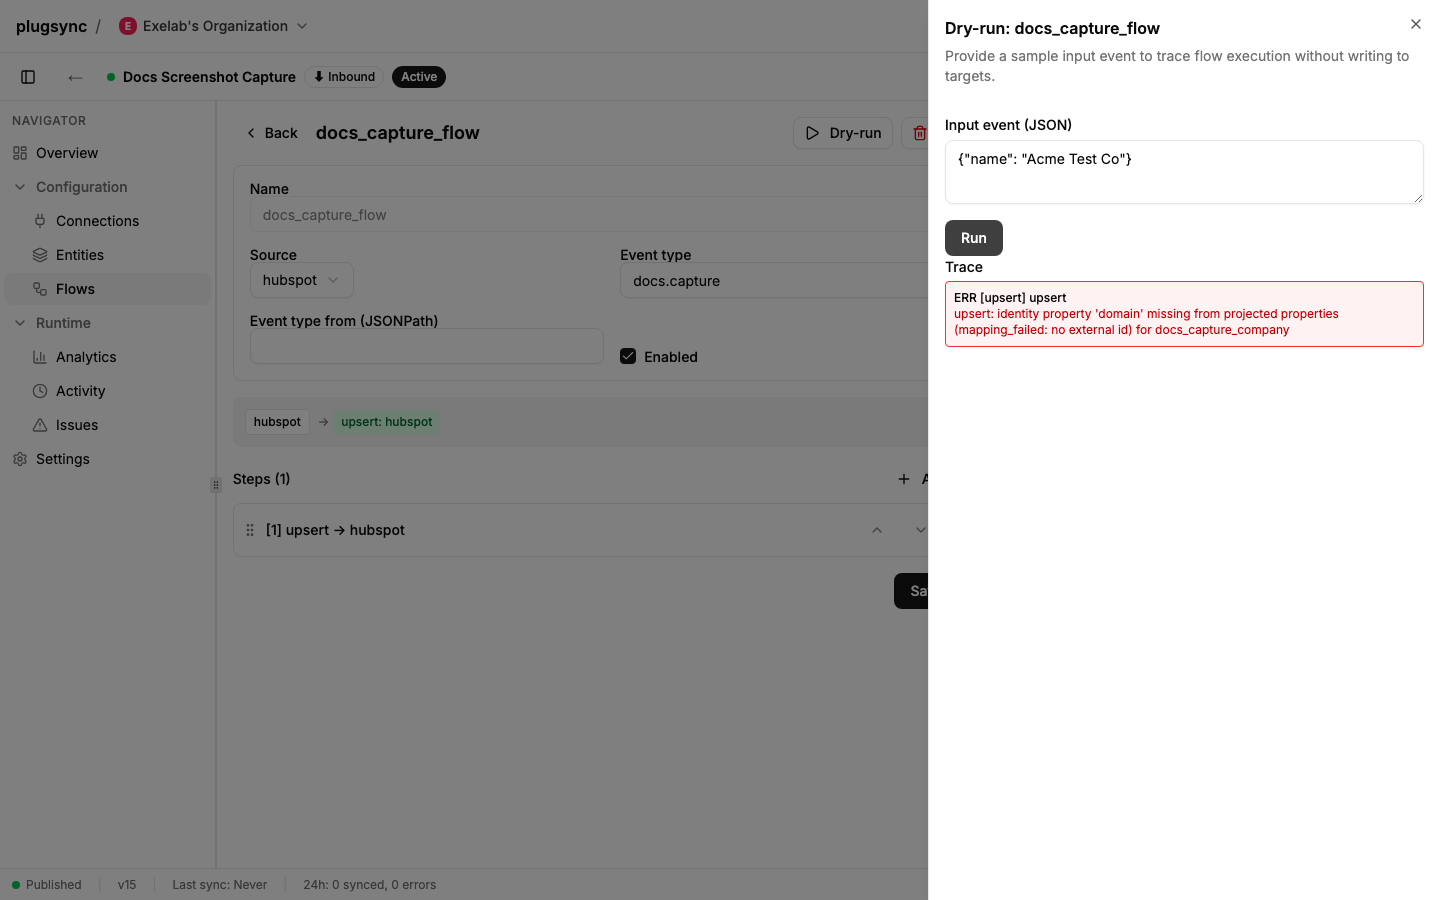
ERR [upsert] upsert: identity property 'domain' missing from projected properties (mapping_failed: no external id) for docs_capture_company —
by design, this fails visibly instead of silently collapsing every
event onto the same HubSpot record, which is what would happen if
plugsync guessed at a match. Fix the payload (or the mapping) and re-run
the dry-run until the step shows OK before switching to real traffic.
Already sent bad events for real? Check the connector’s Issues tab,
Errors sub-tab, which has the same per-step trace for every event that
actually failed. Once the mapping is fixed and published, replay those
records one by one from the Activity tab: every row the platform can
re-run carries a Replay action, and the replay runs against the config
version you just published. See
Reliability: retry, failures, replay.
Publish conflicts
The dashboard has a dedicated modal for this:
Your draft is out of date — Someone published v{n} while you were editing. Your draft is based on v{m}. Reapplying your changes on top of v{n} is up to you. There is no auto-merge.
with two buttons: Discard my changes and load v{n}, or Keep editing
(will not publish). It triggers on an HTTP 409 from POST .../publish
when two people (or two tabs) edit and publish the same connector’s draft
close together — there’s exactly one mutable draft per connector, and the
first publish to land wins.
This screen isn’t captured above, because it is genuinely hard to provoke on your own: the draft’s base version follows the active version on every publish, so two back-to-back publishes from the same session line up instead of conflicting. The realistic trigger is two people (or two tabs) editing the same connector at once. If you do hit it, the two buttons above are the entirety of your options — there’s no automatic merge, by design.
Conflict detection looks inactive
On a Bidirectional connector with conflicts.strategy set to
target_wins or most_recent, the Conflicts tab (Issues section) can stay
empty even after you deliberately provoke a conflict (e.g. send a stale
inbound event after editing the same field by hand in HubSpot). Before
concluding the engine is inert, check the one rule that trips up almost
everyone testing this for the first time:
target_wins and most_recent only arbitrate a property whose last
HubSpot edit came from a system OTHER than plugsync itself. If the last
write to that property was plugsync’s own previous sync — which is the
common case on a connector you just set up, where plugsync has been the only
writer so far — there is nothing “foreign” to arbitrate, and the inbound
write proceeds with zero rows added to Conflicts. That is the strategy
working as designed, not a broken engine. See
conflicts in the Config V3 reference
for the full semantics.
Two ways to confirm the policy really is running without waiting for a real conflict:
- The Conflicts tab itself shows a small hint under the empty state when the policy is active but has never matched anything yet.
GET /api/connectors/{id}/conflicts/countreturnspolicy_activeandnever_matchedalongside the pending count.
To actually see a conflict recorded: edit the contested field in HubSpot directly (as a human, via the CRM UI) first, then send the inbound event — that makes the last HubSpot edit genuinely foreign, which is what the policy is built to catch.
Where to go next
- Config V3 reference — every field on
ConnectorConfigV3, every validator, two full worked examples. - Event Flow Manifest guide — the step DSL in depth, EventSources, loop prevention for bidirectional connectors.
- API-first quickstart (also embedded at
/docson the API) — webhooks, bulk import, dry-run from the command line, health/error contract. - Plugin authoring (custom imperative logic): the Plugin runtime guide.